
As you'll remember from yesterday, all crochet starts with a chain. For today's little project (did I mention that we are going to make something you can use?) you will need a chain that is 20 stitches long. In crochet lingo, patterns/instructions would just say chain 20 or ch 20.
Done that? Good, now ch1. This is important. At the start of each new row of crochet stitches, you need to add a 'spacer' or 'height' chain. This stops your work getting all rucked up and curly. Depending on the stitch you use, you may need more of these 'spacer' chains, but for double crochet, you just need one.
You are going to work back along the row picking up one half of the chain. With the chain facing you, you need to pick up the top loop of each stitch. Hopefully, the arrow below shows what I mean by 'top loop'...

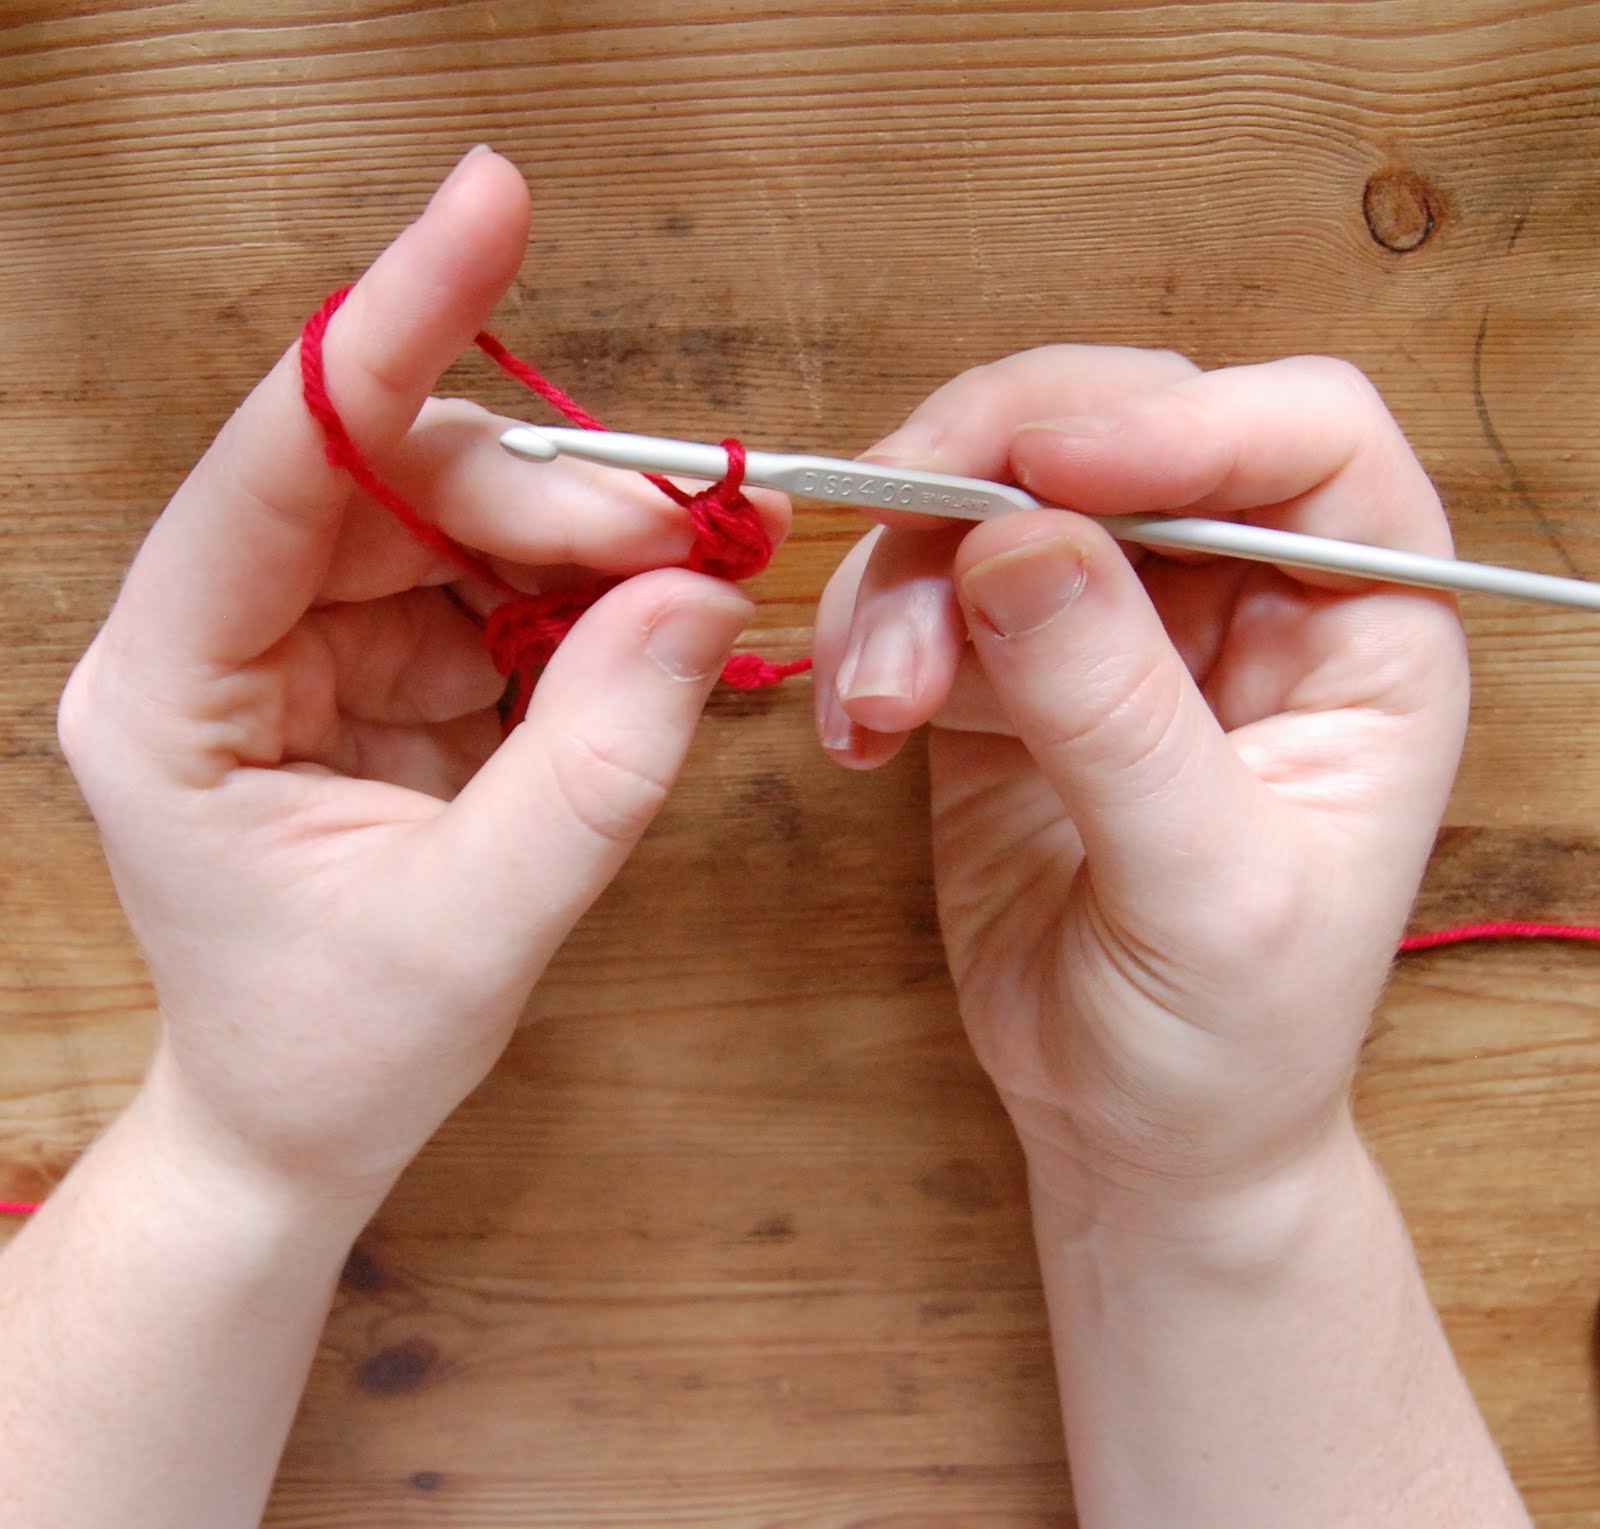
Put your hook through the second chain from the hook. This is chain no. 20 if you count along from the other end of your chain. Yarn over and pull back through the chain. You should now have two stitches on your hook, like this:

Yarn over again:

And pull through both stitches. You should have something like this:
Do the same in the next stitch, and keep going until you get to the end of the row. It should start to look like this:

When you get to the end of the row, don't forget to add your spacer chain and importantly, turn your work over. You should always be working right-left across the top of your work.
Now, I did say we would be making something you can use, so keep going...

And going...

Until you have a square....

Ta-daa!
To finish off your coaster, leave yourself a few inches of yarn at the end before you snip it from the ball. Pull the loop right through the final stitch and weave the ends into the crochet stitches using a knitters' needle. Don't be tempted by a sewing needle. You'll never get the yarn through the eye for a start and because it's so pointy, a sewing needle will split all your lovely stitches. A knitters' needle is blunt and allows you to weave through the stitches without splitting the yarn.
As usual, practise makes perfect. Especially if you don't usually work with yarn. It's one of those things where you keep doing it and doing it and then one day, the penny will just drop and you'll be off! Try making a set of coasters and see how you improve.
If you're following this and have any questions, just leave a comment below and I'll do my best to help!
Great tutorial. I haven't crocheted for a while and have never made anything as square or as neat as that lovely coaster. I'm going to have a go!
ReplyDeleteMillie
Thank you, that's very kind. Like I said, it's just practise - once you get the tension right (and even) it will take care of itself!
ReplyDelete